
If you have ever had to schedule more than a few meetings in one go, you know it can take some time to sort out the details of each. As a result of the time spent on this at Aimpoint Digital, we came up with the idea to simplify this process with a Power Automate flow. Today, you can use the same approach to create your meeting scheduler and grab our free templates!
When To Use This Power Automate Flow
This process is ideal when four or more meetings need to be scheduled, recurrence is not required (or not preferred), and the meeting is hosted in Teams. You can modify this to be an Outlook event, use a meeting software of your choice, or even include additional options for customization. With that said, let’s dive in!
Power Automate: Setting Up the Flow
First, you will navigate to your Power Automate module in Microsoft Office. To get there, go to office.com, log in with your details, click the waffle menu (the 3×3 grid of dots) in the top left, and select Power Automate.
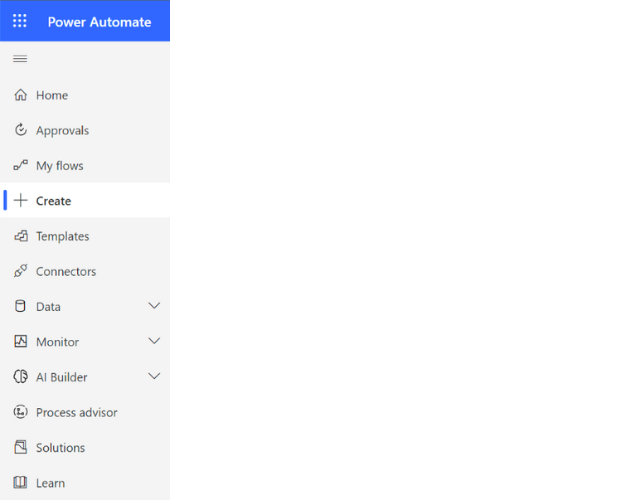
From there, choose Create from the sidebar. (This may look different in your Power Automate instance due to admin settings).
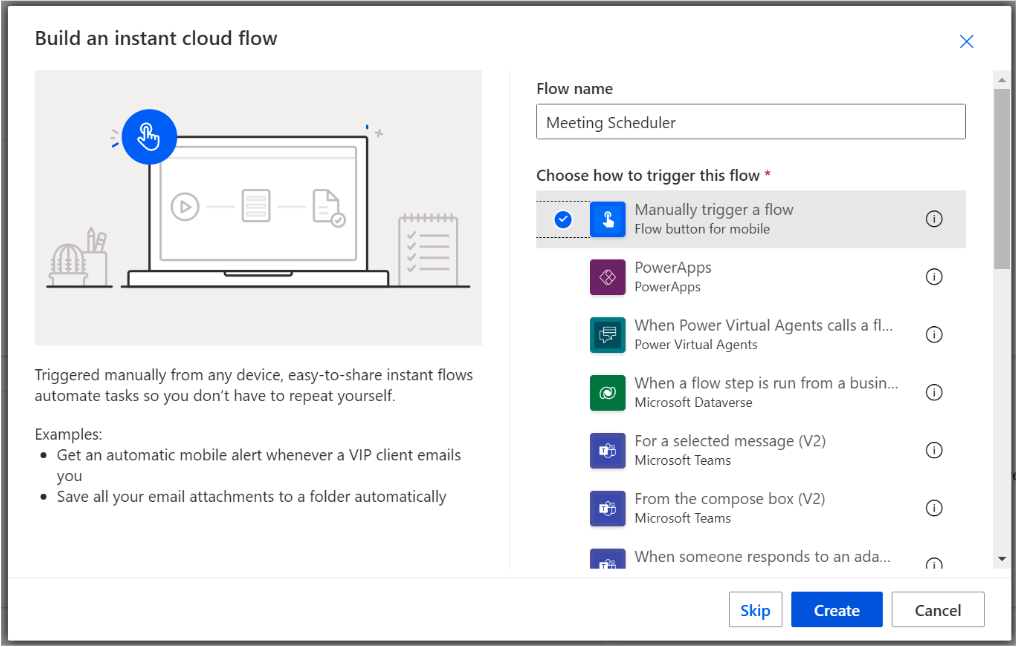
After selecting Create, choose Instant cloud flow. Inside your newly created Instant cloud flow, you will select Manually Trigger a flow and give your flow a name. In this case, name the flow Meeting Scheduler.” Then click Create. This will take you to a new screen containing just the Trigger step.
There’s nothing like a fresh canvas! You will click + New step from here and type “meeting” in the search bar.
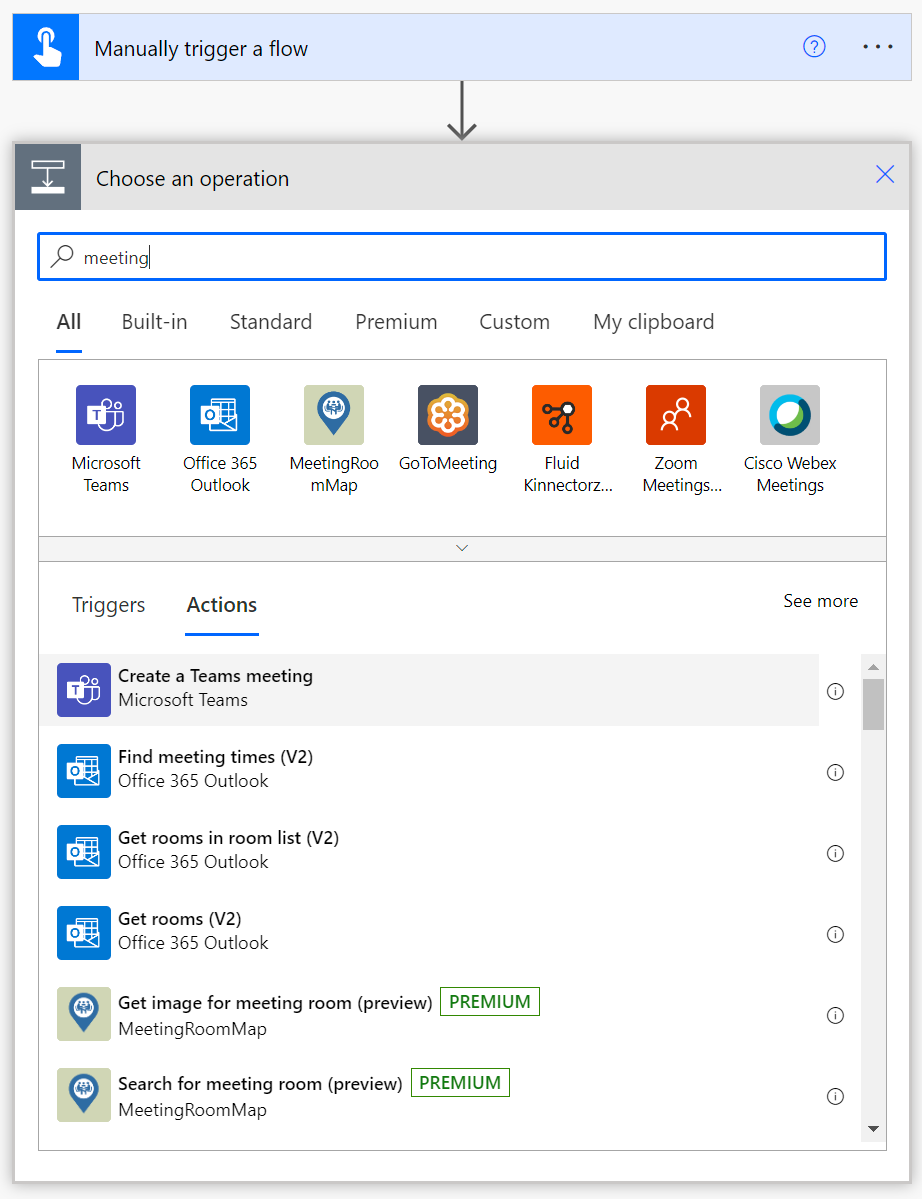
Select Create a Teams meeting. For this example, you will need values for each of the fields shown here:
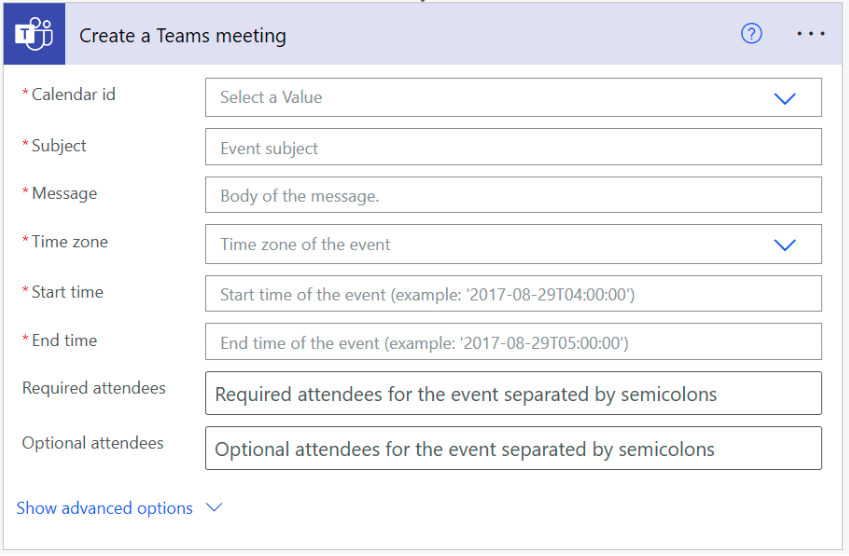
You will not use any of the advanced options in this guide.
Manual Meeting Creation
You now have a component that will generate a Teams Meeting when you manually trigger your flow. To fill in the details of this meeting, you will need to type in those boxes manually, as in this example:

Remember that the time will be 24-hour style, so the example above is 4 PM to 5 PM.
Today, you will have access to create the upgraded version of this by feeding the required fields with a data source. In this case, you will use the Excel template provided to fill in the details of your Teams Meeting.
As another significant benefit, the email body is in HTML and allows formatted text! The template (insert link from sharefile or appropriate solution) contains the fields needed for your Teams Meeting and is here:

Power Automate will read in and adequately place the appropriate fields in the Teams meeting component of the flow.
Excel Template Meeting Creation
The function we will use to read the Excel template is to List rows present in a table. Hover on the line above the Create a Teams meeting component and click the + symbol. We place this step before the Teams component because we use it as a source for our Team’s required fields. Then choose Add an action. The action you want is under Excel Online (Business), called List rows present in a table.
From here, you can navigate to the file’s location and fill in the details. After connecting the provided Excel template, you can fill in the required Teams fields with the corresponding fields. At this point, your flow will look like this:
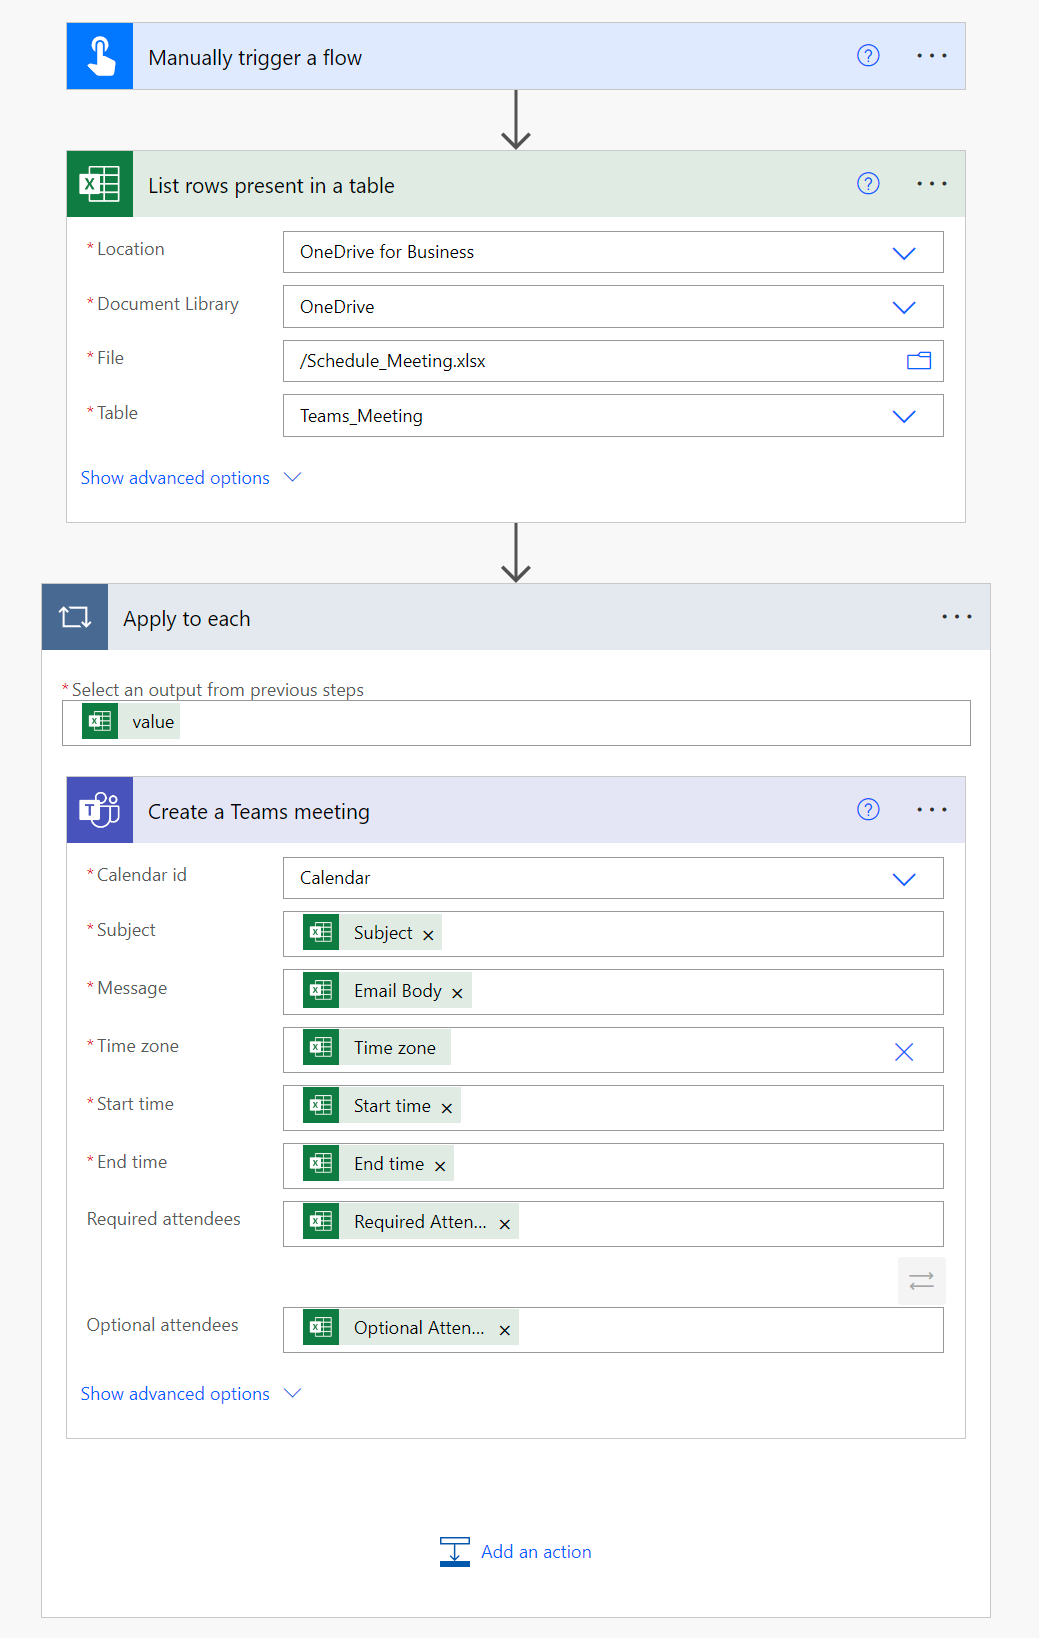
You can see that an Apply to each box has been automatically placed around our Create a Teams meeting. Don’t worry– you can create a separate and unique meeting for each row in our Excel template. Let’s head to the template to put in a test meeting!
Using the Excel Template
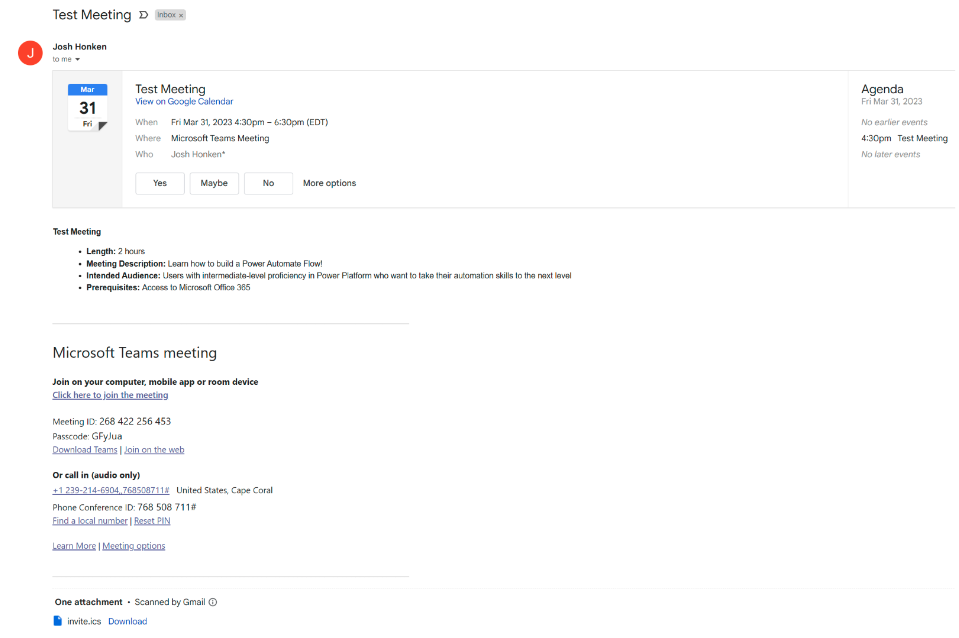
It is crucial to note the required format in the Excel template in each column. One extra character or space in the start and end time can mean a failed flow run. Here is a test meeting (found in the Example tab).

Testing the Flow
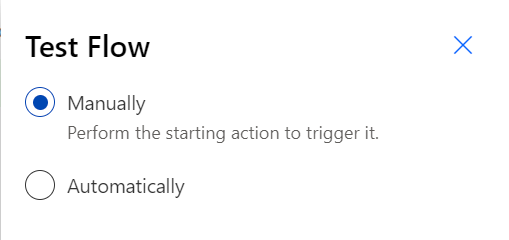
You can return to your Power Automate flow and test it from the edit window. Click on Test in the upper right-hand corner next to the beaker.

Now choose Manually
You may authorize using Teams and Excel, then click Test and Run Flow. You can then go to the Run History (as well as your test email inbox) to determine if the flow ran successfully.

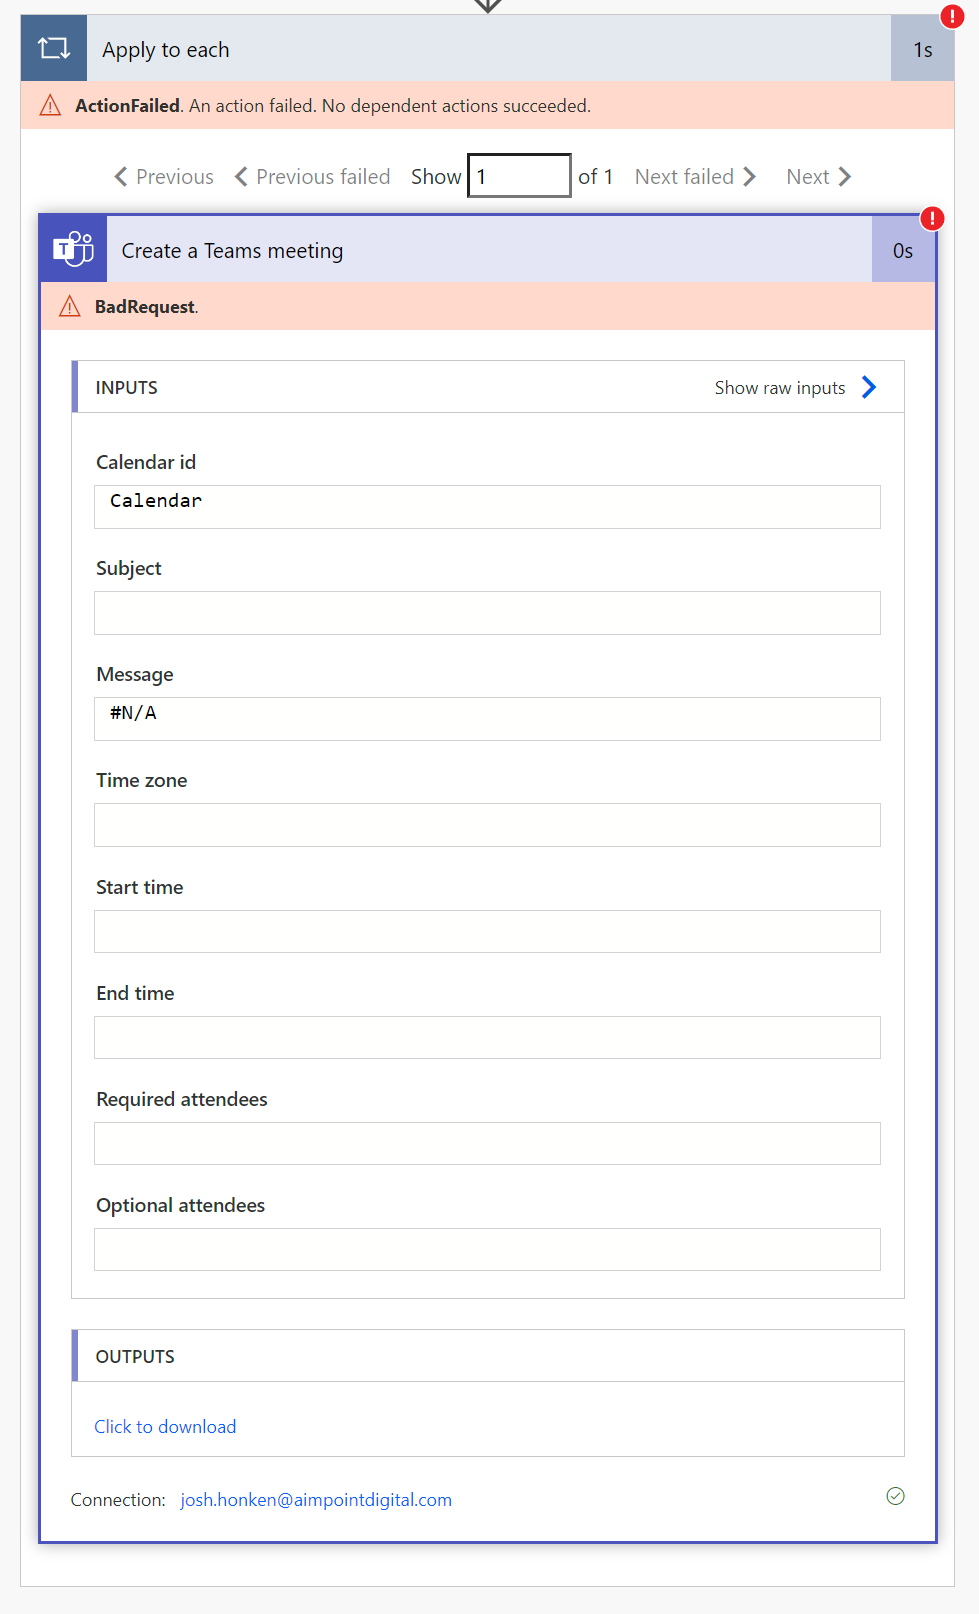
If your flow shows that it failed, click on the timestamp under Start time and navigate to the component of the flow with a red exclamation point.
This will provide further details about the issue that requires resolution for a successful run.

In the case of the failure above, the flow was pointing to an empty file, as shown by all these blanks:
Other common issues include the date format for start and end times or separating emails with a comma instead of a semi-colon. It is essential to follow the date format precisely, as shown in the example.
You can copy and paste the model and modify it for your dates and times. One last note on issues or problems would be permissions. If you run into permissions issues, contact your Microsoft Administrator.
Additional Customization and Improvement
From here, you have the option to make some additional improvements to your flow. A few that might prove helpful would be:
- Data validation dropdown options for commonly scheduled meetings
- Auto-populated HTML formatted meeting text for the email body (use a site like https://wordtohtml.net/ to save time)
- A parallel branch in your flow that archives scheduled meetings
- A delete rows script in your Excel that runs after each flow to prevent accidental double booking
Conclusion
You now have a great way to schedule multiple meetings for everyone from one central place. One use case would be a trainer sending out the agreed-upon sessions for enablement in specific software. Another might be setting 1:1 meetings with all direct reports for quarterly or annual reviews. There are many ways to customize and enhance this flow to fit your needs. At this point in the process, you might be thinking, “I could use this to…” and you’re probably right! The possibilities are endless: you can schedule a meeting when a file is loaded to SharePoint when you get an email with the subject “ABC_123,” or when you get a Teams message containing “Can you set up a meeting?” This only scratches the surface, as we only use the create a meeting function! We’d love to connect if you have questions about this or need help implementing Power Automate in your organization.


