
Introduction: What is Snowflake and Alteryx?
Snowflake is a cloud-based data warehousing platform popular among data professionals for its scalability, security, and advanced analytics capabilities. On the other hand, Alteryx is a data analytics platform that allows users to blend, clean, and analyze data from various sources, including Snowflake. Alteryx’s user-friendly visual interface and automation features make it easy to build sophisticated data workflows without requiring any coding skills. To fully appreciate the benefits of using Alteryx for data loading to Snowflake, it’s essential to understand what these two platforms are and how they work together.
In this blog post, we’ll guide you through the process of loading data into Snowflake using Alteryx. Specifically, we’ll focus on two different methods – ODBC Connection and Bulk Upload – and provide best practices for optimizing the data loading process. By using Alteryx to load data into Snowflake, you can take advantage of both platforms’ strengths to create efficient and scalable data workflows that meet your organization’s specific needs. So, let’s dive in and explore the power of Alteryx and Snowflake together.
Why Load Data to Snowflake Using Alteryx?
Today you will see two different methods of loading a table to Snowflake using Alteryx. If you need to load a table to your Snowflake instance, this task is very approachable in Alteryx. It is likely even more straightforward than doing it in Snowflake directly. Snowflake has about six steps; this has about three.
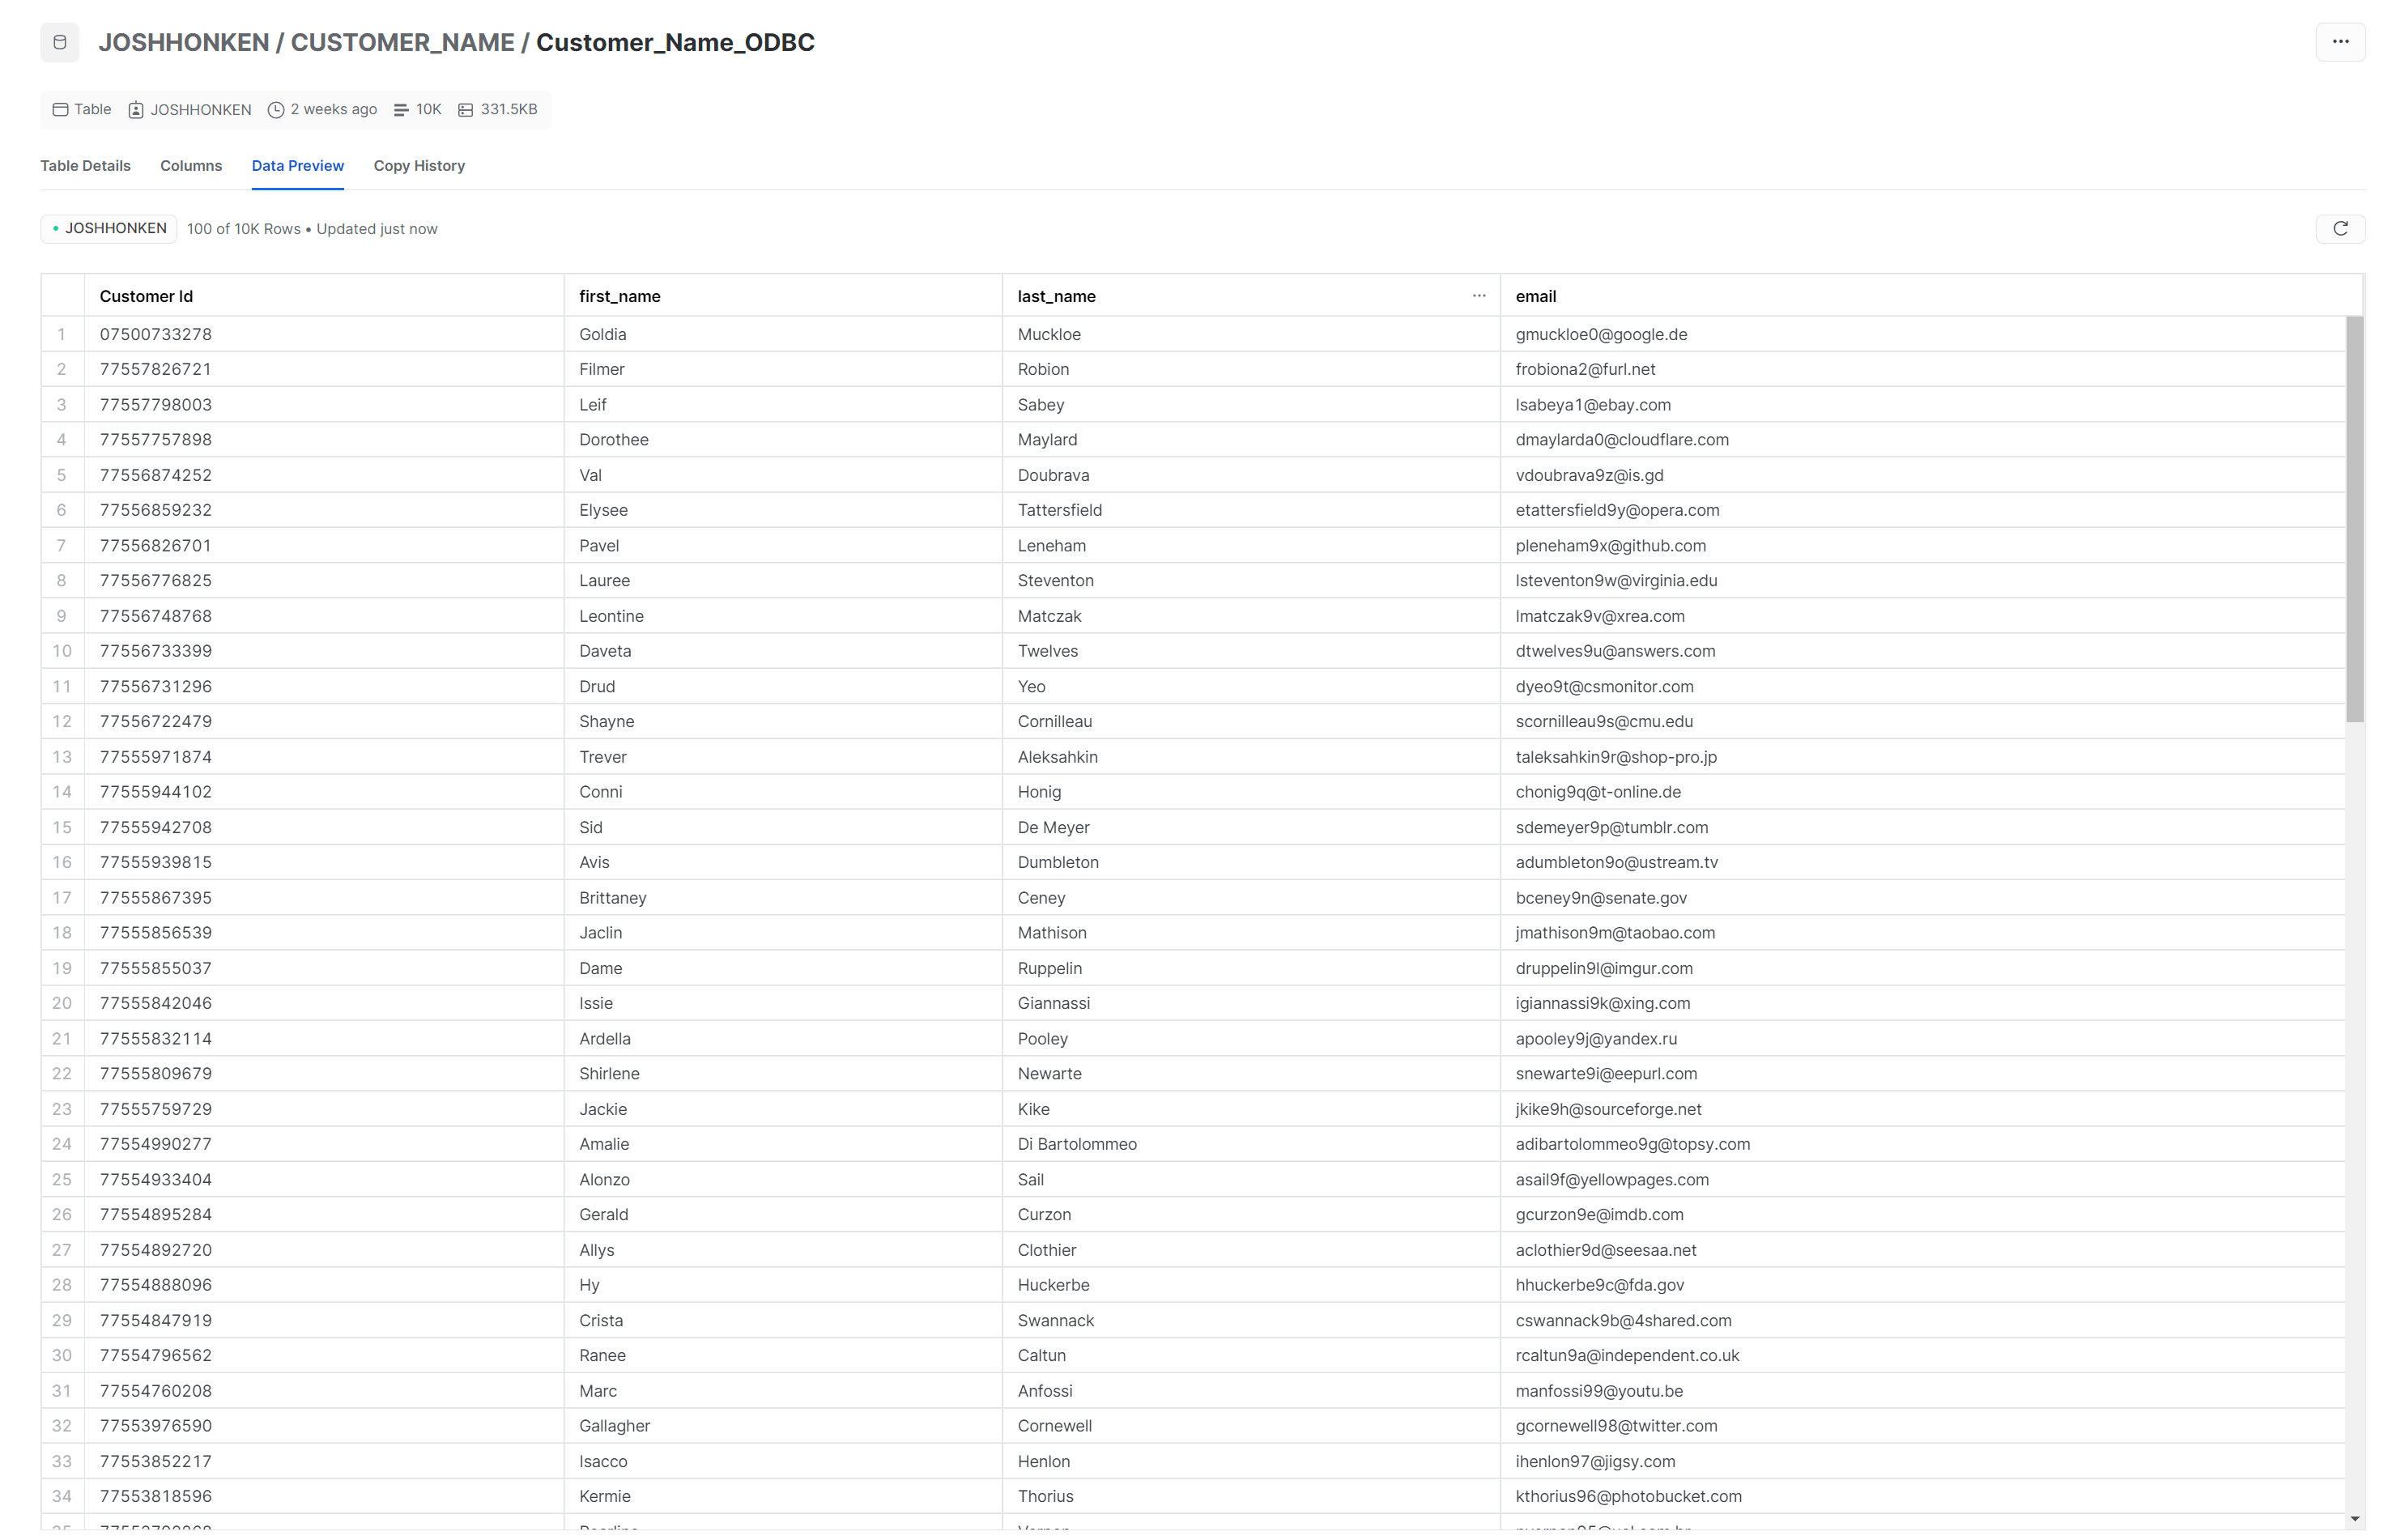
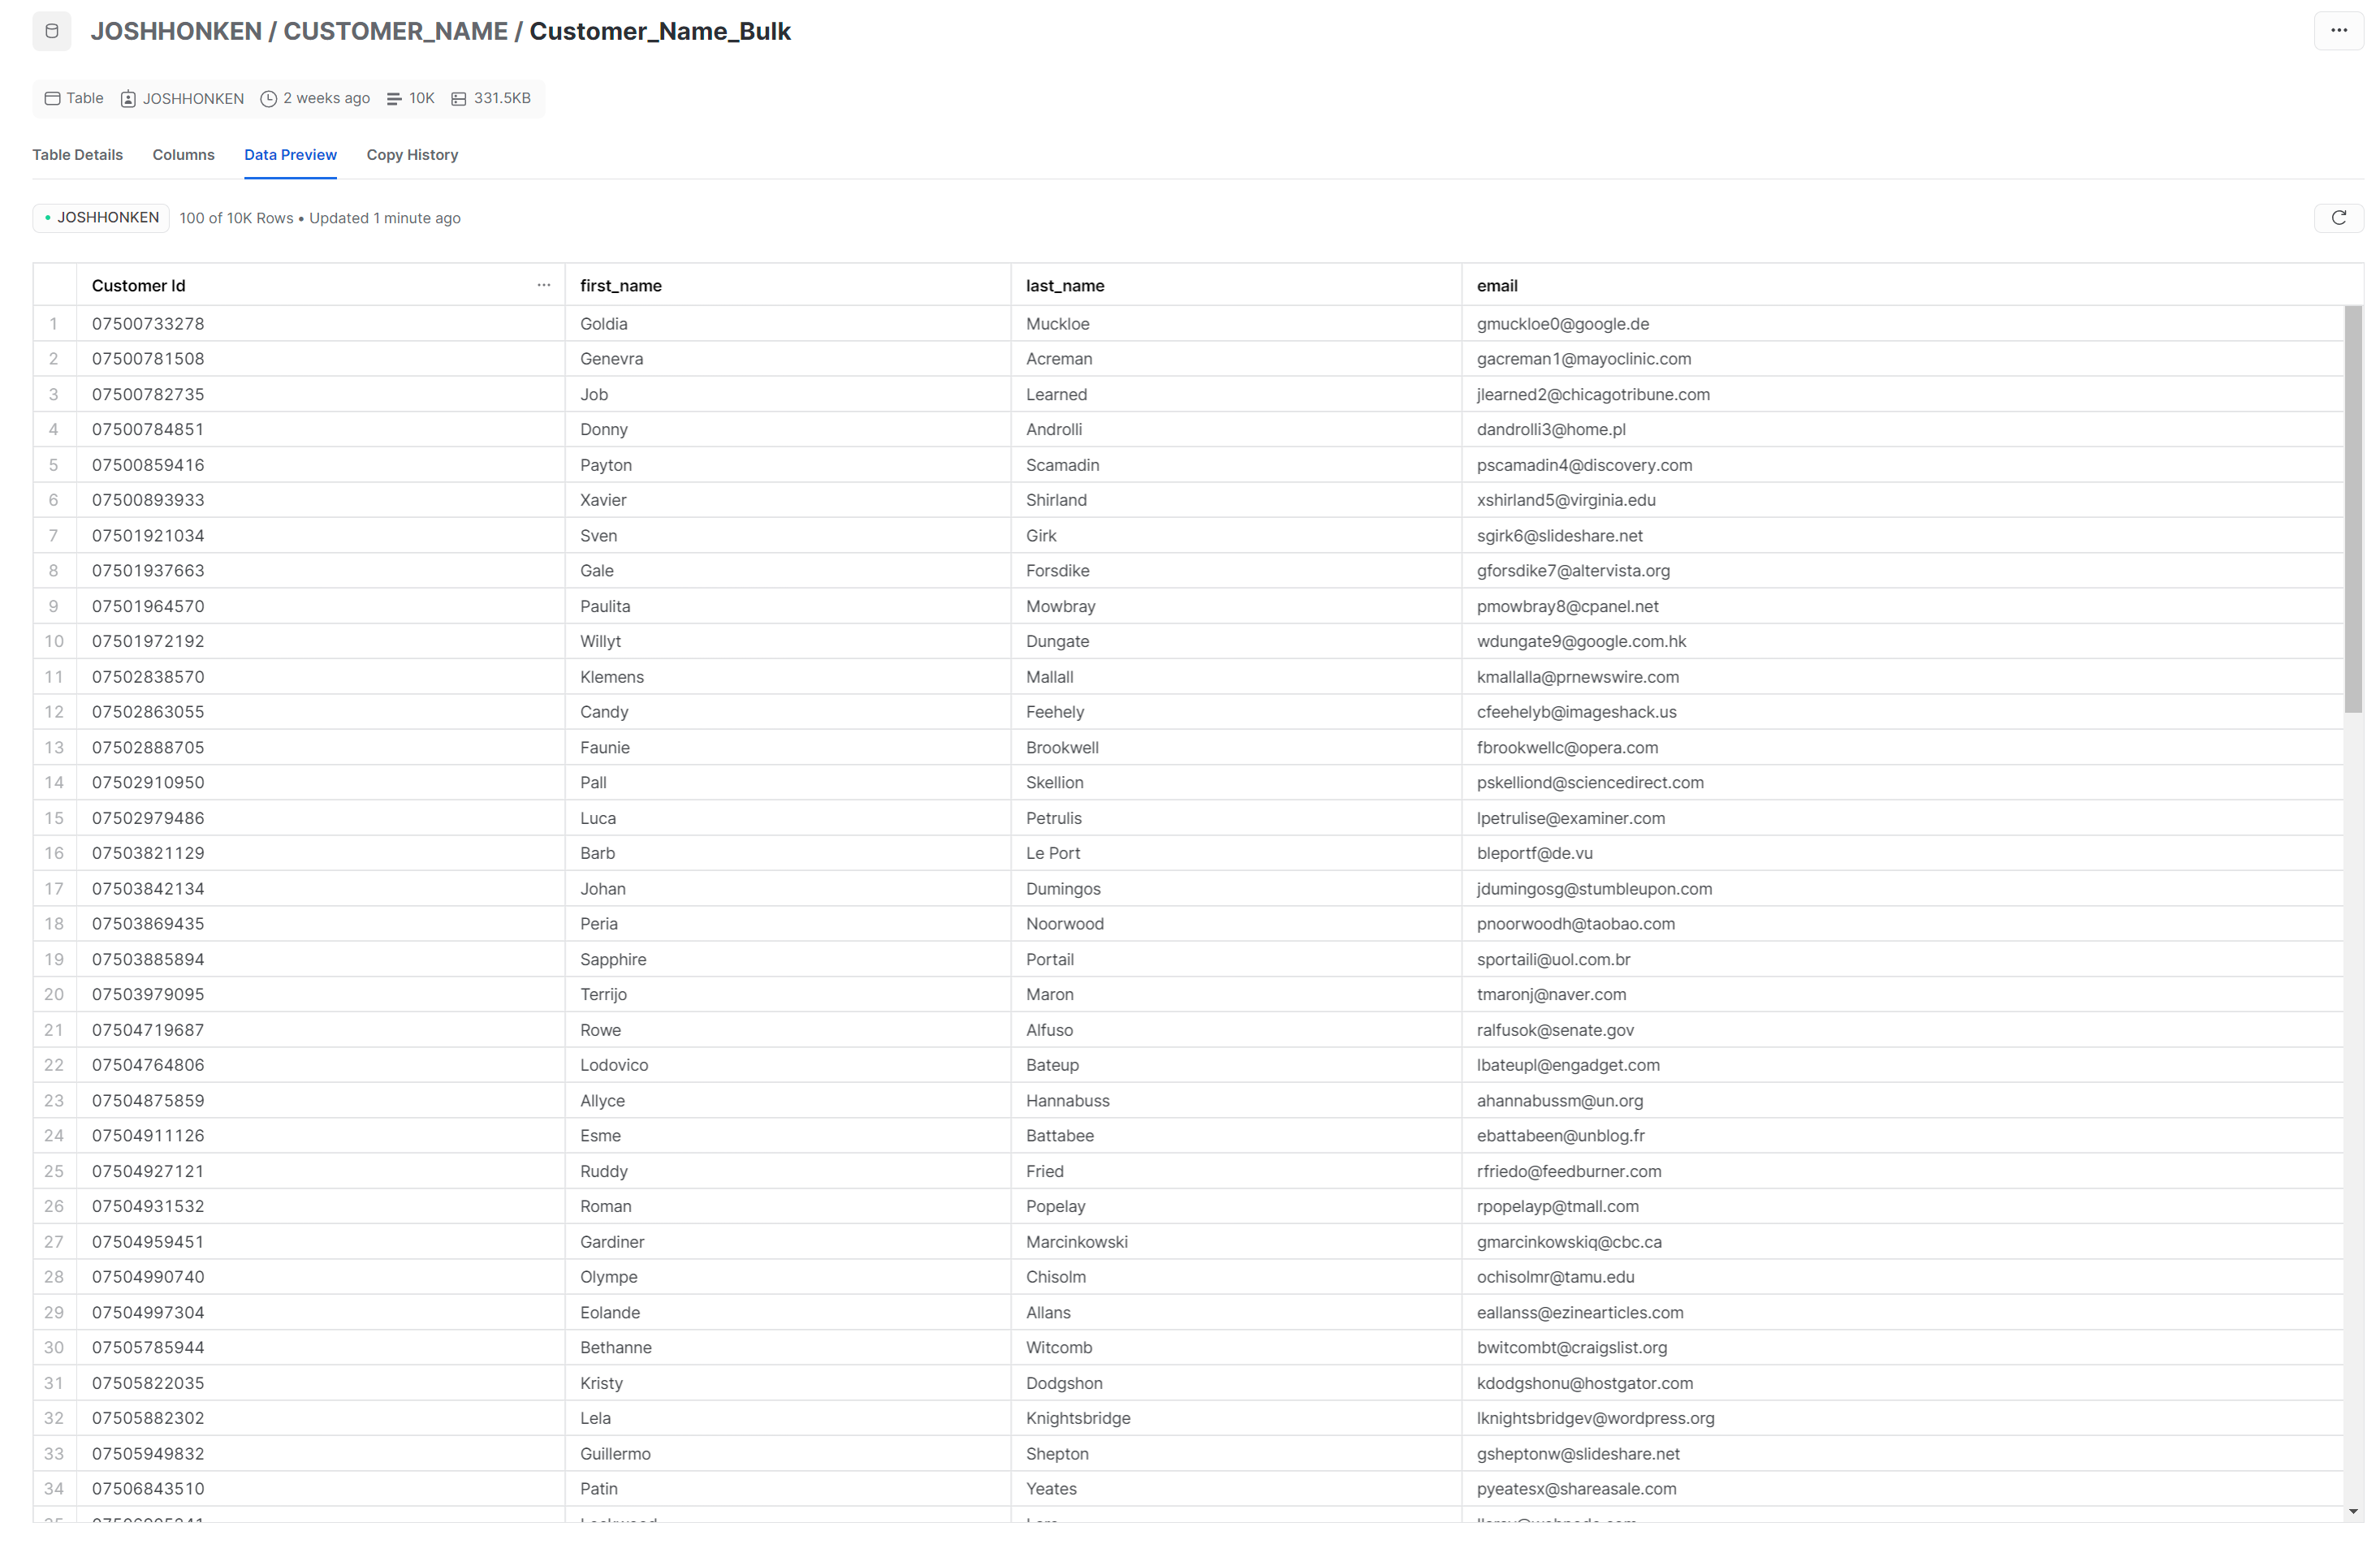
The example file has 10,000 records and four columns, including the unique ID. Record count is noteworthy because ODBC uses individual insert statements, as documented here. That means Alteryx would run an insert statement for every single row uploaded – 10,000 statements for this data. This could be more efficient and faster with any significant number of rows. For large data, we recommend you use the bulk loader tool. We will cover both in this article.
ODBC Connection Method
Here are the steps to setting up a Snowflake load using an output too:

1. Load an acceptable file type to your input tool. It must be one of the following:
- JSON
- AVRO
- CSV
- PARQUET
- ORC
- XML
I like to remember them with the acronym JACPOX. I learned that in our Snowflake training here at Aimpoint (which is coming soon).
2. Optional steps here would be to use a select tool to limit your data to only the needed columns. You could also use an auto-field tool, as shown above, to make use of the smallest possible size for each column. For more great suggestions to increase speed, check out this article from the Alteryx Knowledgebase.
3. Drag an output tool to the canvas, configure it, and run!
This is the step that deserves the most attention. You can use an ODBC connection with a username and password, as we show here:

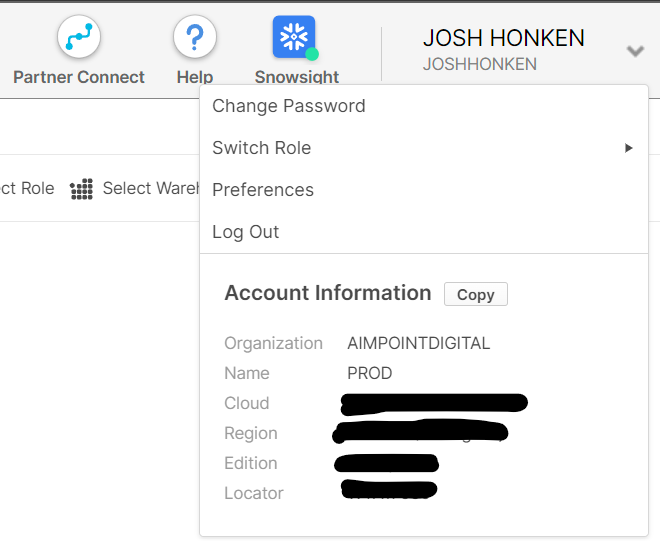
To fill out this configuration dialog box, you’ll likely need details about your Snowflake instance. If you have them saved, you can plug them right in; otherwise, you can open up Snowflake in your web browser and find your server name by navigating to the locator in the upper right corner of Snowflake, as shown here:
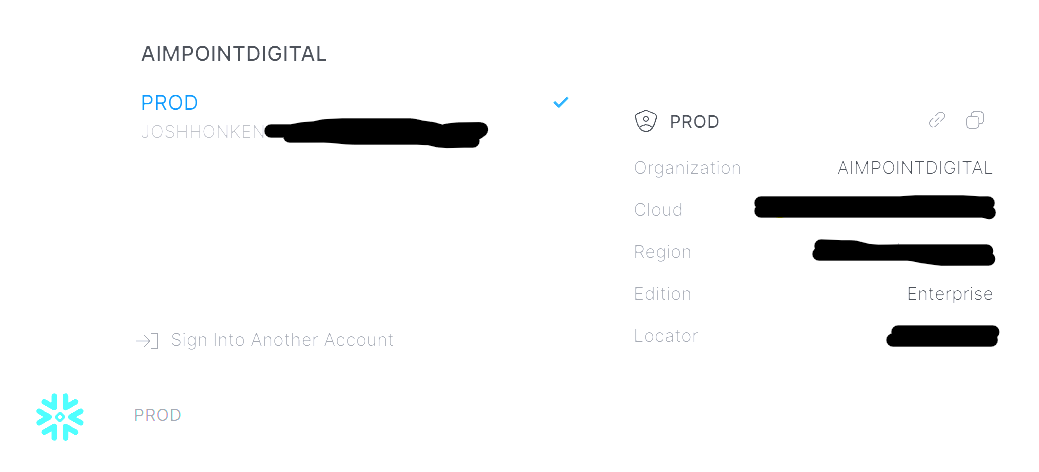
If you are previewing the new interface Snowsight, (which is in preview but can be selected in the top ribbon as highlighted above), then this information is in the bottom left corner as shown here:
It is essential to double-check the details of your connections. The server is the most likely culprit here. I typed mine in as locator.region.Snowflakecomputing.com. Regarding your region, it will be typed as it appears in the URL (including hyphens), not with spaces.
As far as the other boxes we need to fill in, you can grab Database and Schema from your database objects on the lefthand sidebar, as shown here:
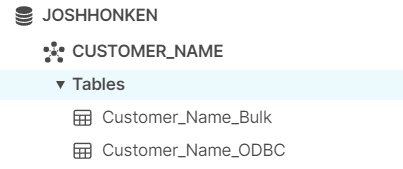
The database value here is JOSHHONKEN, and the Schema is CUSTOMER_NAME.
Now that we have our details filled out, we can click test in the lower left corner of the Snowflake configuration dialog to be sure things are working as expected:

If you don’t get a successful test, step through each needed value and take another look at the Server value.
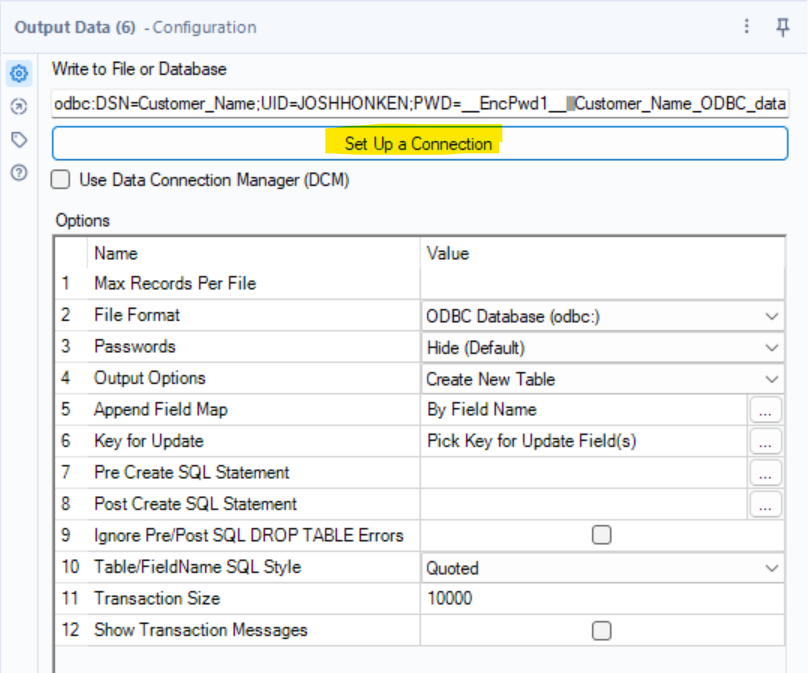
Once you get a successful test, you can plug these details into your Output Tool. To use this method, select the Output Tool. Then click on Set Up a Connection in the Configuration Pane. Now you’ve come back into Alteryx, but you probably want to tell them how to get that ODBC connection they created into the output tool.
This will bring up a menu of data connections to choose from, and you can navigate to Data Sources -> Snowflake -> ODBC.
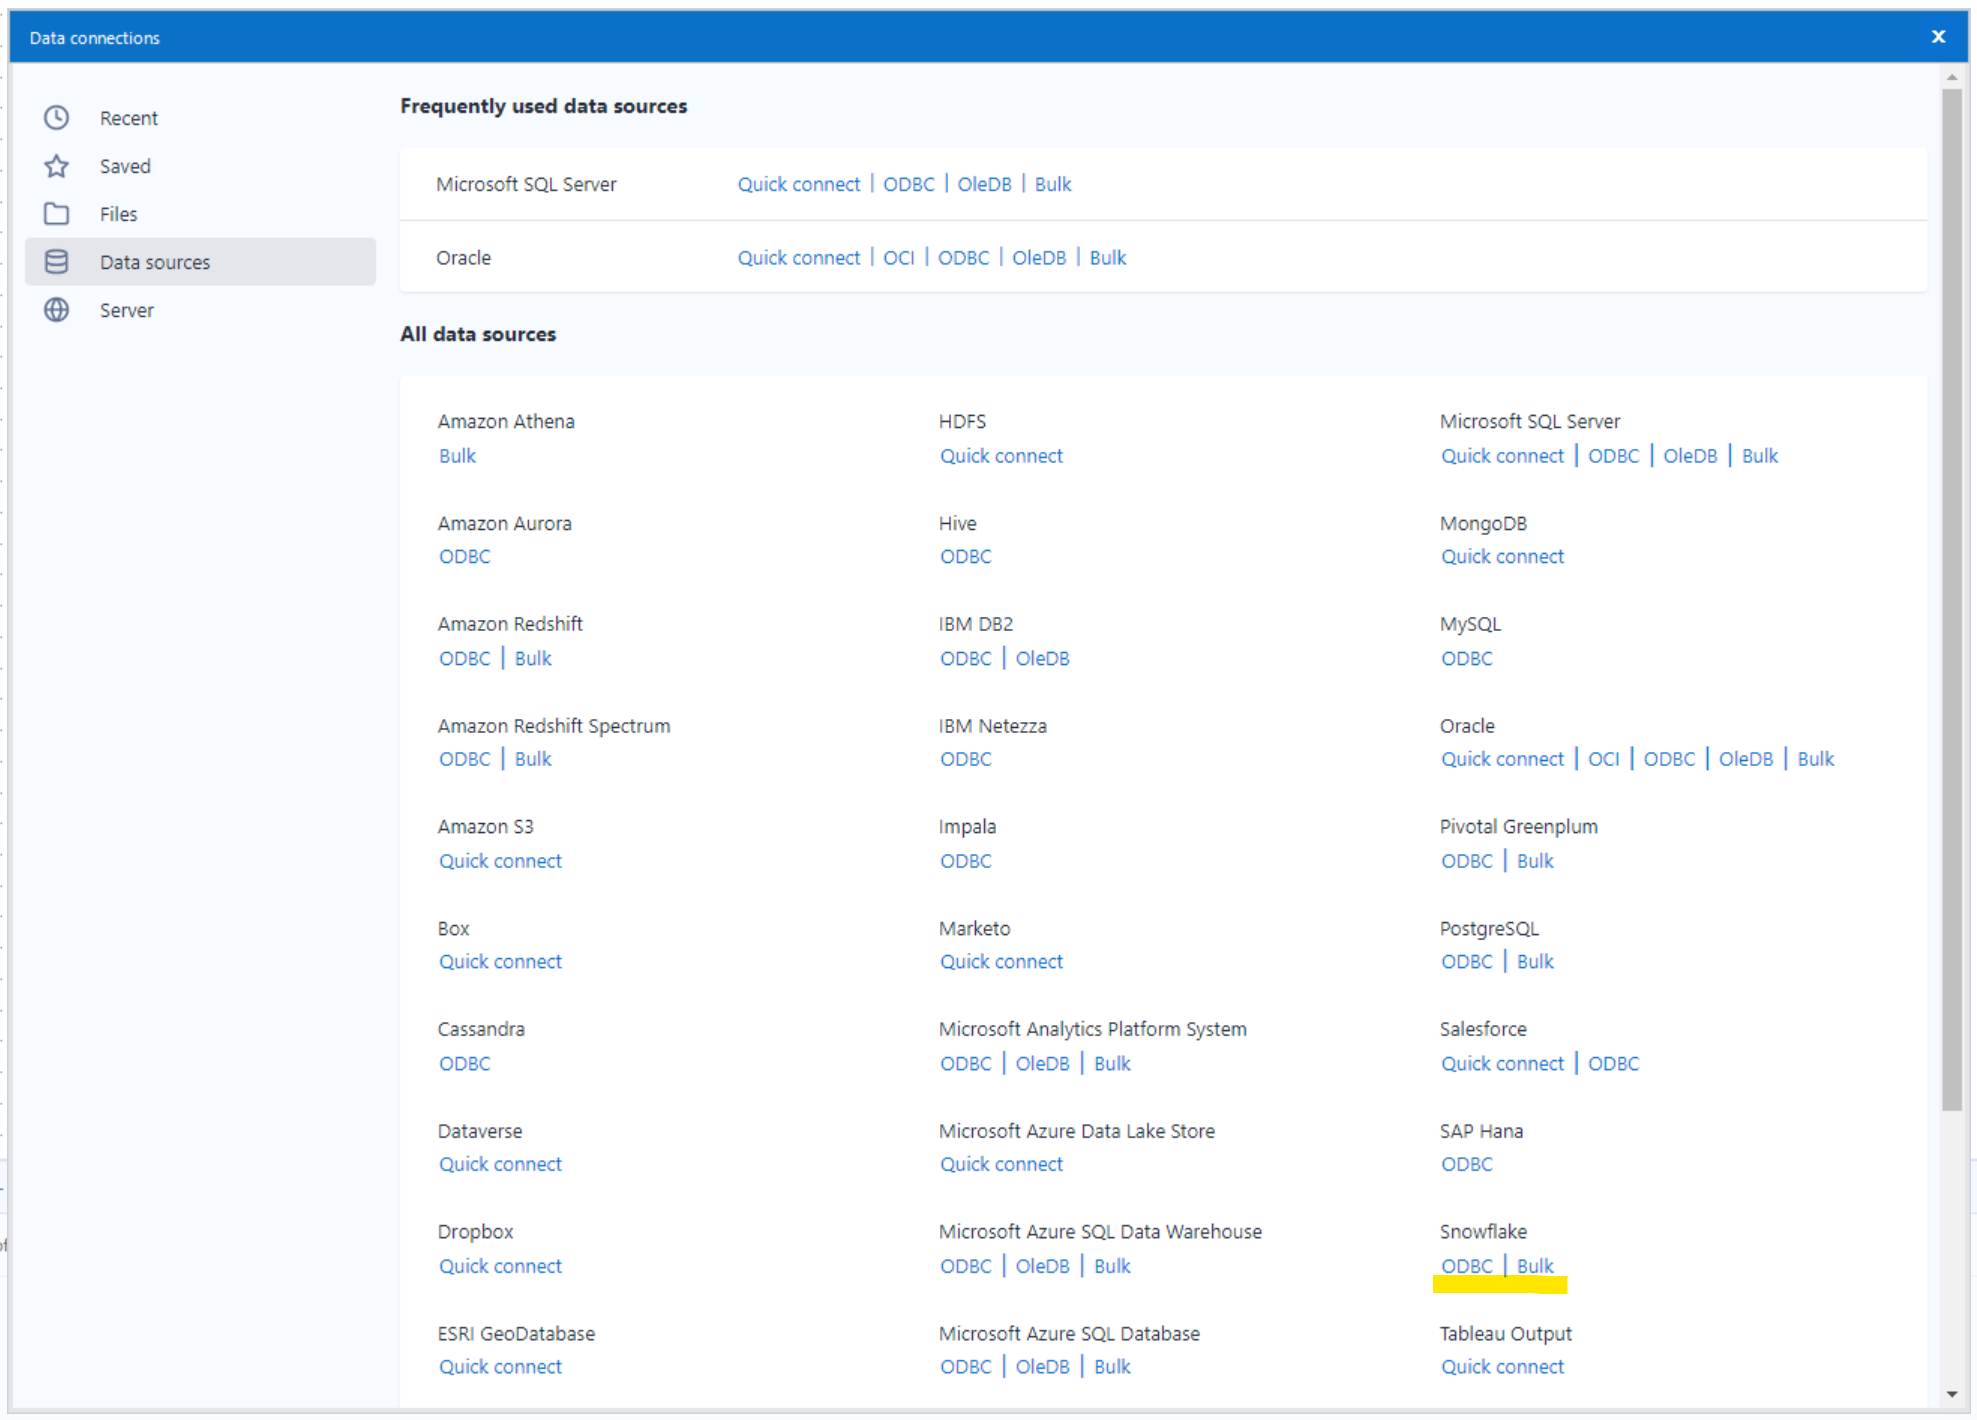
Choosing that will bring up a dialog box allowing you to select your data source name:
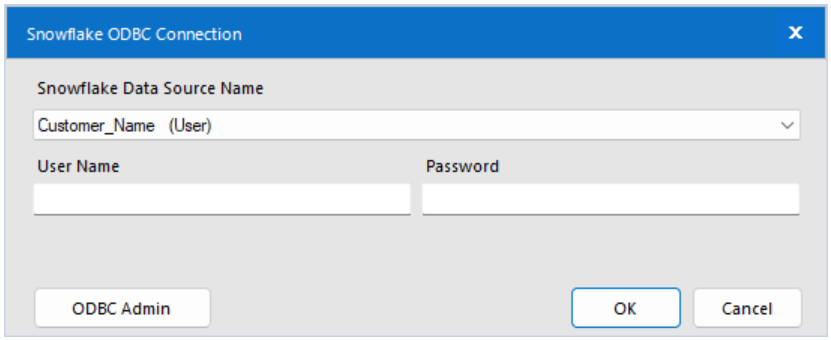
If you haven’t yet set up a data source, check the first steps in this blog; otherwise, select the Data Source Name you’ve previously created. This flow ran in 6.3 seconds, writing 10,000 rows to a new table in Snowflake!
Bulk Upload Method
The alternative approach (the preferred method for big data) is to use the Bulk option. You can use the same file but load it as a separate table for this. The flow will look identical, but the output tool will configure differently.
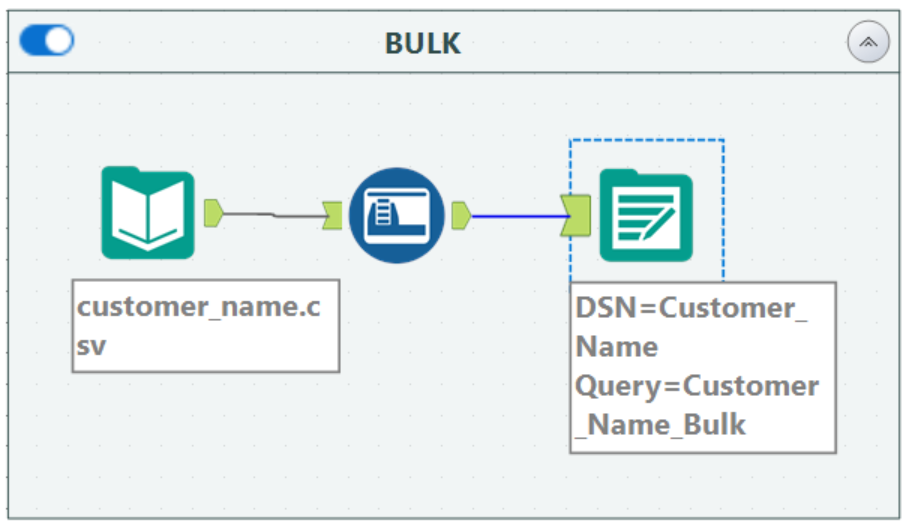
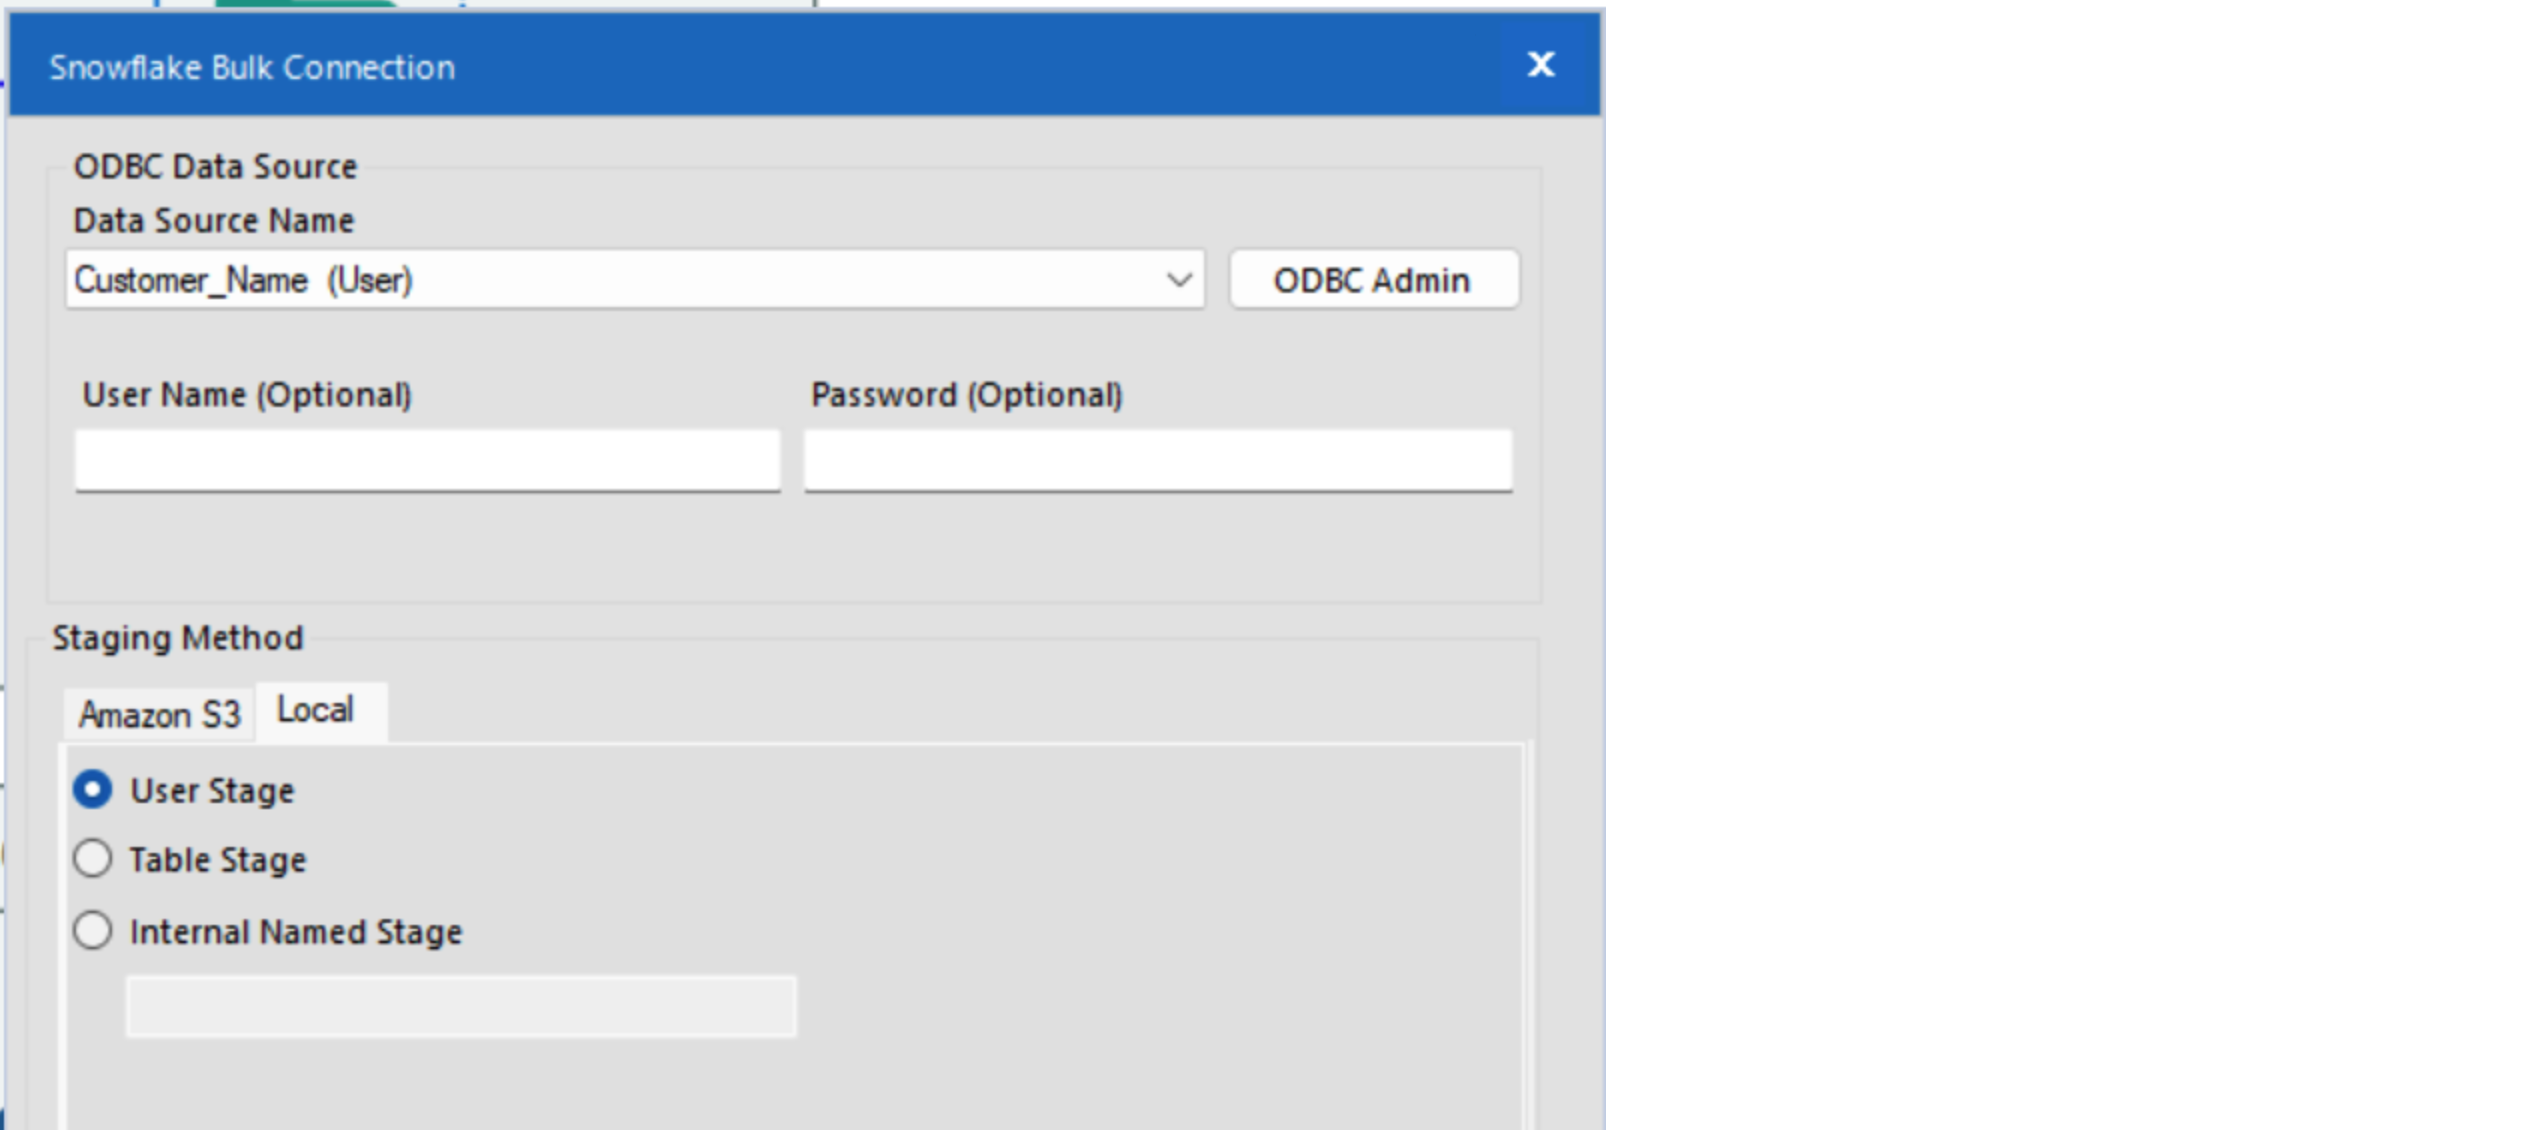
This time, when we click Set Up a Connection, we will still navigate to Data Sources and Snowflake but choose Bulk. We still need to select our Data Source Name from the previous step, but here we will also choose a staging method. You can use your preferred staging method, but for the example here, click on the local tab and select User Stage.
This flow finished in 6.0 seconds! While this sounds like a minor improvement, on a dataset with millions of rows, it will significantly impact the run time. The data looks the same, but you can notice the name up top is specific to the method used:
Today you stepped through two different means of loading a file to Snowflake as a table. The bulk upload is the suggested method from a performance standpoint and best practices with Snowflake.
If you want to leverage Alteryx or Snowflake more effectively in your business or speak to an expert about more ways to bring efficiency to your data work, please fill out the form below. We’d love to hear from you!


